
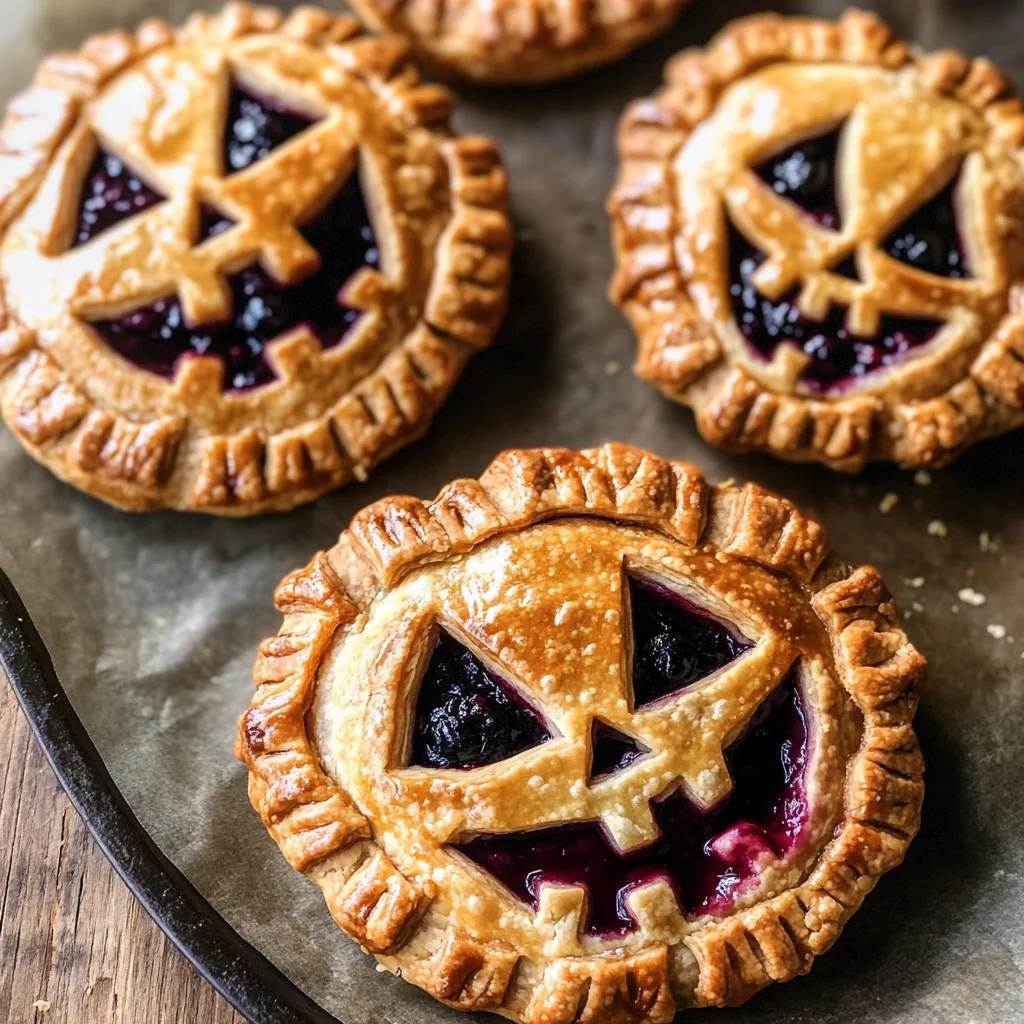
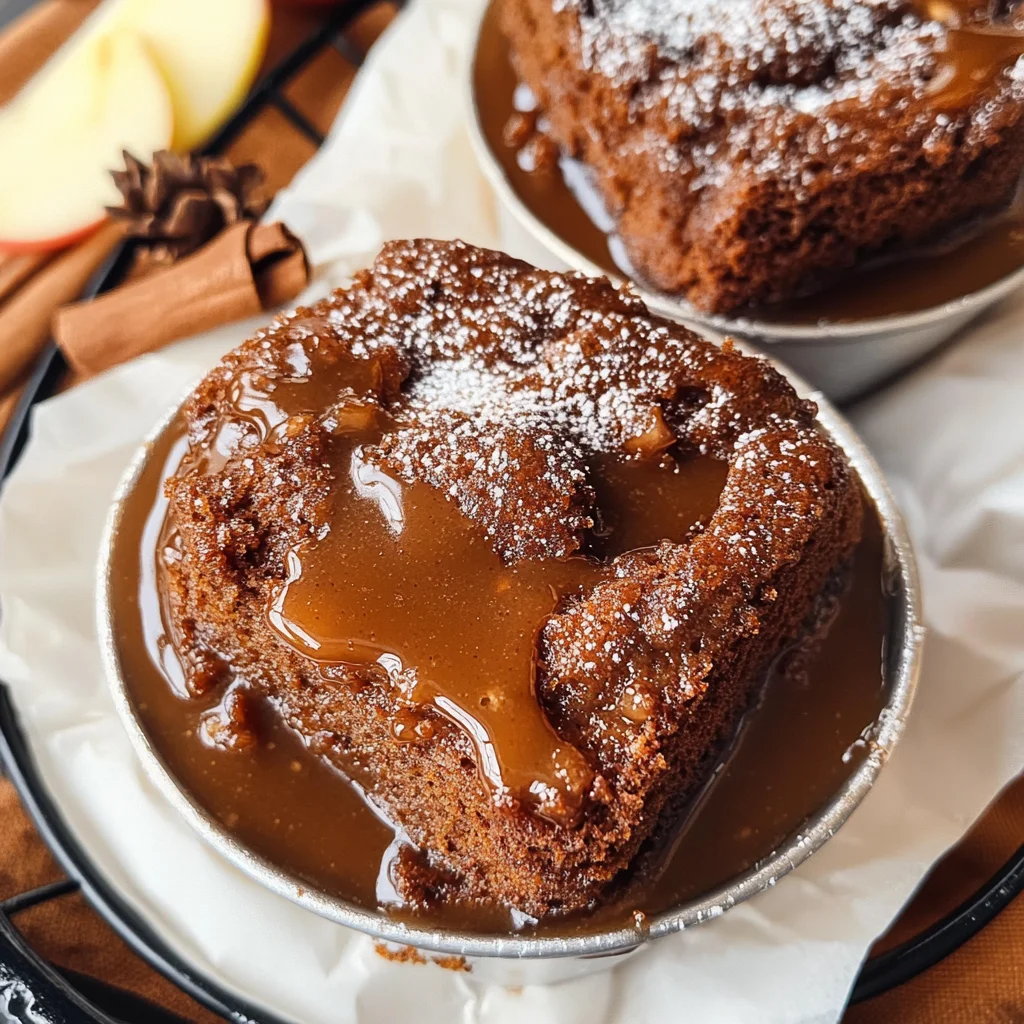
If you’re looking for a fun and festive treat to celebrate Halloween, these Jack-O-Lantern Hand Pies are just the thing! They’re not only adorable but also packed with delicious flavors from fresh apples and blackberries. The best part? These little pies are perfect for any occasion—whether it’s a family gathering, a cozy night in, or a spooktacular Halloween party!
What makes this recipe special is the combination of flaky, buttery crust and sweet, fruity fillings. Plus, they’re surprisingly easy to whip up! I love making them with my kids; we have a blast decorating the pumpkin faces together. Trust me, these hand pies will be the highlight of your dessert table!
Why You’ll Love This Recipe
- Family-Friendly Fun: Making Jack-O-Lantern Hand Pies is a great way to spend quality time with loved ones while creating something delicious.
- Flexible Fillings: Use your favorite fruits or leftovers you have on hand—this recipe is easy to customize!
- Perfect for Celebrations: These cute treats add a festive touch to any Halloween gathering or autumn celebration.
- Make-Ahead Convenience: Prepare the dough and fillings ahead of time, then assemble and bake when you’re ready to enjoy.
- Deliciously Sweet: With a delightful mix of flavors from apples and blackberries, everyone will love these tasty hand pies!
Ingredients You’ll Need
These Jack-O-Lantern Hand Pies are made with simple, wholesome ingredients that you can easily find in your pantry. Here’s what you’ll need:
For the Dough
- 2 1/2 cups all-purpose flour
- 1 tablespoon granulated sugar
- 1 teaspoon kosher salt
- 2 sticks (8oz) unsalted butter, diced and very cold
- 6-9 tablespoons ice water
- 1 egg (for egg wash)
- 1/4 cup raw or turbinado sugar (for sprinkling)
For the Apple Filling
- 2 large honey crisp apples, peeled and diced small
- 3 tablespoons salted butter
- 2 tablespoons bourbon barley tea
- 1 teaspoon vanilla bean paste
- 1/2 teaspoon ground cinnamon
- 2/3 cup brown sugar
For the Blackberry Filling
- 18 oz fresh blackberries
- 1/3 cup granulated sugar
- 1 teaspoon vanilla extract
Variations
This recipe is wonderfully flexible! Feel free to get creative with your fillings or shapes. Here are some fun ideas:
- Switch Up the Fruit: Use pears or peaches instead of apples for a different flavor twist.
- Add Spices: Experiment with spices like nutmeg or ginger in your fillings for an extra kick.
- Try Different Shapes: Use cookie cutters to make other festive shapes like ghosts or bats if you’re feeling adventurous!
- Make Them Savory: Swap out the sweet fillings for savory options like cheese and veggies for a different treat.
How to Make Jack-O-Lantern Hand Pies
Step 1: Prepare the Crust
To begin making your Jack-O-Lantern Hand Pies, first prepare the crust. In the bowl of a stand mixer fitted with the paddle attachment, combine flour, sugar, and salt. Mixing this dry mixture helps ensure even distribution of flavors in your crust. Then add in very cold butter all at once and beat on low until it resembles coarse sand with pea-sized pieces of butter. This step is crucial because it creates that delightful flaky texture we all love in pie crusts!
Step 2: Chill the Dough
Once your dough starts clumping together, tip it out onto a lightly floured surface. Gently knead it into a rough ball before dividing it into two portions. Wrap each tightly in plastic wrap and flatten them into discs. Refrigerating allows the butter to firm up again which helps prevent shrinkage while baking.
Step 3: Make the Apple Filling
In this step, you’ll create that scrumptious apple filling! Heat butter in a stainless steel sauté pan until it’s just golden brown—this adds extra flavor! Toss in diced apples and cook briefly before adding bourbon barley tea along with vanilla bean paste, cinnamon, and brown sugar. Cooking until syrupy brings out all those lovely flavors which will perfectly complement our hand pies.
Step 4: Roast the Blackberries
For an equally delicious filling option, line a baking sheet with parchment paper and roast fresh blackberries at 400 degrees F for about 30 minutes. This enhances their natural sweetness! Once roasted, transfer them to a pot with sugar and vanilla extract before simmering until thickened. Letting everything cool down to room temperature is important so they don’t make your pie soggy.
Step 5: Roll Out Dough & Cut Shapes
Now comes the fun part! Roll out one disc of chilled dough on a floured surface until it’s about 1/8 inch thick. Using a pumpkin cookie cutter, cut out as many pieces as you can! Place these on another parchment-lined sheet and refrigerate them briefly so they hold their shape during baking.
Step 6: Assemble & Bake
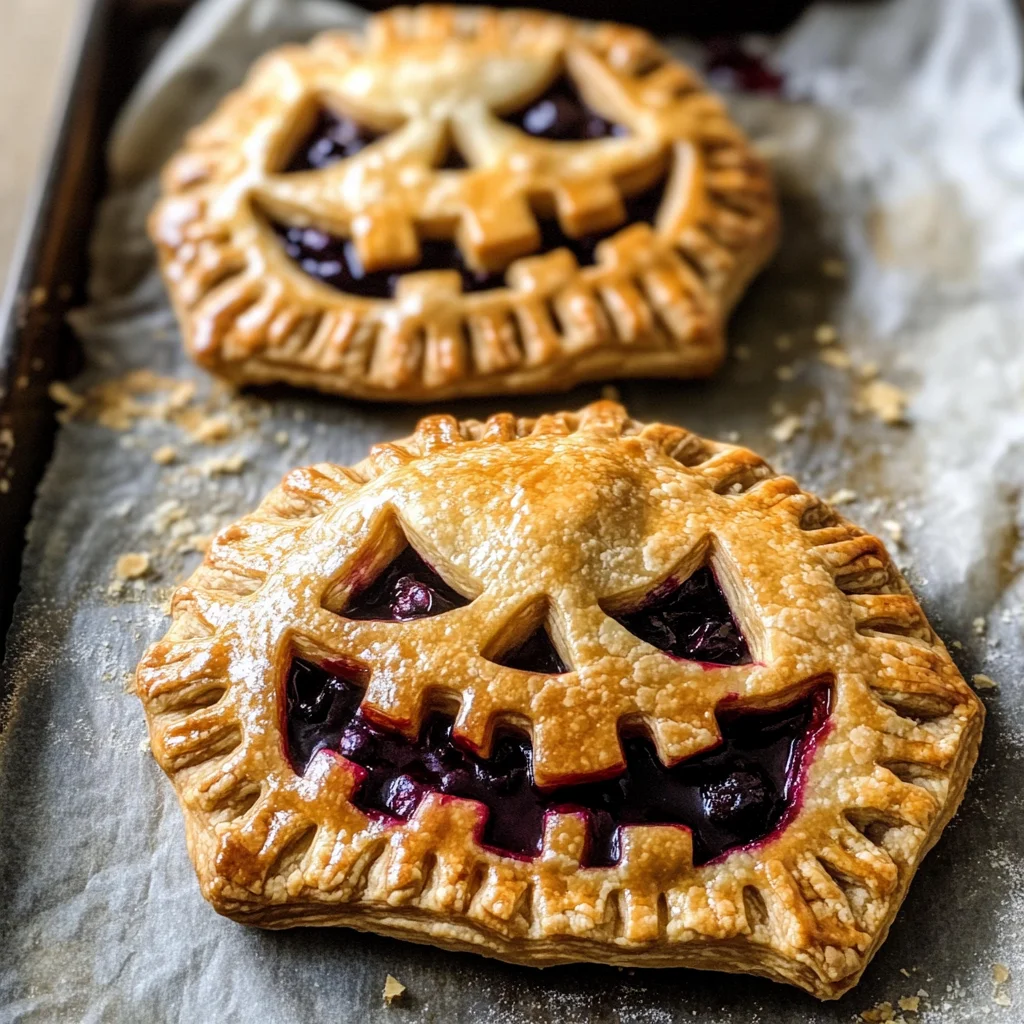
Preheat your oven to 375 degrees F. It’s time to assemble those adorable hand pies! Brush egg wash around the edges of uncut pumpkin pieces before adding about 1 ½ tablespoons of filling right in the center. Top with cut-out faces and seal using fork tines—you want all that yummy filling tucked inside! Finally, bake them until golden brown for about 25 minutes.
Let these lovely Jack-O-Lantern Hand Pies cool on a rack before serving—enjoy every bite as they disappear faster than you can imagine!
Pro Tips for Making Jack-O-Lantern Hand Pies
Making Jack-O-Lantern Hand Pies can be a delightful experience, especially when you have a few handy tips to ensure they turn out perfect!
- Use very cold butter: Starting with cold butter helps create a flaky crust. The cold fat creates steam as it melts, resulting in that desirable flaky texture.
- Chill the dough: Make sure to refrigerate your dough before rolling it out. This not only makes the dough easier to work with but also helps maintain its structure during baking.
- Don’t overfill: It’s tempting to add more filling, but too much can cause the pies to burst open in the oven. Stick to the recommended amount for perfectly sealed hand pies.
- Cut out faces carefully: When cutting jack-o-lantern faces in the top crust, be sure to do so gently to avoid tearing. A sharp knife or small cookie cutter works best for clean edges.
- Allow cooling time: Let your hand pies cool on a baking rack before serving. This ensures that the filling sets slightly and prevents burns when biting into them!
How to Serve Jack-O-Lantern Hand Pies
These whimsical hand pies are not only delicious but also fun to present! Here are some ideas for serving them at your Halloween gathering.
Garnishes
- Whipped coconut cream: A dollop of this sweet, fluffy topping adds a creamy contrast and enhances the festive feel of your dessert.
- Chocolate drizzle: A simple drizzle of melted dairy-free chocolate can add both flavor and visual appeal, making your hand pies even more enticing.
Side Dishes
- Pumpkin soup: A warm bowl of pumpkin soup pairs wonderfully with these hand pies, creating a cozy fall meal that’s perfect for chilly evenings.
- Mixed green salad: A fresh salad with seasonal ingredients like pears and walnuts adds a refreshing crunch that balances the sweetness of the pies.
- Apple cider: Serve these hand pies alongside hot or cold apple cider for a quintessential autumnal experience—sweet and comforting!
- Roasted vegetables: A side of roasted root vegetables can complement the flavors in your hand pies while providing a hearty touch to your Halloween spread.
By following these tips and presentation ideas, you’ll be well on your way to impressing your guests with these adorable Jack-O-Lantern Hand Pies!
Make Ahead and Storage
These Jack-O-Lantern Hand Pies are not only adorable but also perfect for meal prep. You can make the dough and fillings ahead of time, ensuring you’re ready to whip up these festive treats whenever the mood strikes!
Storing Leftovers
- Store leftover hand pies in an airtight container at room temperature for up to 2 days.
- For longer storage, place them in the refrigerator, where they can last for about a week.
Freezing
- To freeze, allow baked hand pies to cool completely.
- Place them in a single layer on a baking sheet and freeze until solid.
- Once frozen, transfer the hand pies to a freezer-safe bag or container, and they will keep well for up to 3 months.
Reheating
- For best results, reheat frozen hand pies in the oven at 350°F (175°C) for about 15-20 minutes until warmed through.
- If reheating thawed hand pies, bake at 350°F for 10-12 minutes or until heated thoroughly.
FAQs
Here are some common questions you might have about making Jack-O-Lantern Hand Pies.
Can I use other fruits for the filling of Jack-O-Lantern Hand Pies?
Absolutely! Feel free to experiment with your favorite fruits like pears, peaches, or even a mix of berries. Just adjust the sugar levels based on the sweetness of the fruit.
How do I prevent my Jack-O-Lantern Hand Pies from getting soggy?
To prevent sogginess, ensure that your filling is not overly watery. You can also blind bake the crusts slightly before adding the filling to create a barrier.
Can I make Jack-O-Lantern Hand Pies without using egg wash?
Yes! You can substitute with a plant-based milk or simply omit it. The sprinkle of turbinado sugar will still give a lovely finish.
What do I do if my pie crust is too crumbly?
If your dough crumbles too much when rolling out, it could be due to insufficient moisture. Add ice water one tablespoon at a time until it holds together better without being sticky.
Final Thoughts
I hope you enjoy making these delightful Jack-O-Lantern Hand Pies as much as I do! They are not only a treat for your taste buds but also bring a fun element to your Halloween celebrations. So gather your ingredients and get ready to impress your friends and family with this charming dessert. Happy baking!
Jack-O-Lantern Hand Pies

Get ready to celebrate Halloween with these delightful Jack-O-Lantern Hand Pies! These adorable, pumpkin-shaped pastries are filled with a luscious combination of sweet apples and juicy blackberries, making them the perfect festive treat for any autumn gathering. Their flaky, buttery crust and charming designs make them not only delicious but also a fun project to share with family and friends. Whether you’re hosting a cozy Halloween party or enjoying a quiet night in, these hand pies are sure to be a hit. Plus, they’re easy to customize with your favorite fruits or creative shapes. Whip up a batch today and watch them disappear just as quickly as you can say “boo”!
- Prep Time: 40 minutes
- Cook Time: 25 minutes
- Total Time: 1 hour 5 minutes
- Yield: Makes approximately 12 hand pies 1x
- Category: Dessert
- Method: Baking
- Cuisine: American
Ingredients
- 2 1/2 cups all-purpose flour
- 1 tablespoon granulated sugar
- 1 teaspoon kosher salt
- 2 sticks (8oz) unsalted butter, diced and very cold
- 6–9 tablespoons ice water
- 1 egg (for egg wash)
- 1/4 cup raw or turbinado sugar (for sprinkling)
- 2 large honey crisp apples, peeled and diced small
- 3 tablespoons salted butter
- 1 teaspoon vanilla bean paste
- 1/2 teaspoon ground cinnamon
- 2/3 cup brown sugar
- 18 oz fresh blackberries
- 1/3 cup granulated sugar
- 1 teaspoon vanilla extract
Instructions
- Prepare the dough by mixing flour, sugar, and salt in a bowl. Cut in cold butter until it resembles coarse crumbs. Add ice water gradually until the dough forms.
- Chill the dough for at least 30 minutes before rolling it out.
- For the apple filling, sauté diced honey crisp apples in butter, then mix in brown sugar, cinnamon, and vanilla until syrupy.
- Roast blackberries with sugar and vanilla extract until thickened.
- Roll out the chilled dough and cut into pumpkin shapes using a cookie cutter.
- Assemble by placing filling on one shape, topping it with another, sealing edges with a fork.
- Bake at 375°F for 25 minutes or until golden brown.
Nutrition
- Serving Size: 1 hand pie
- Calories: 220
- Sugar: 10g
- Sodium: 150mg
- Fat: 10g
- Saturated Fat: 6g
- Unsaturated Fat: 3g
- Trans Fat: 0g
- Carbohydrates: 30g
- Fiber: 2g
- Protein: 2g
- Cholesterol: 20mg
Leave a Comment